

I've been wanting to refinish our dining room table for years. It was an antique style table that we bought new about 9 1/2 years ago, but the finish had gotten terrible. It looked dark and cloudy and felt sticky. Everything stuck to it, especially paper. Once someone put a box of Cheerios on it, and it got stuck. Two years later, it still said "Cheerios." It always looked dirty, so I usually just covered it up with tablecloths. I made a new year's resolution to refinish it myself or hire someone else to do it this year. Then we bought new dining room chairs in January (which I love!), and the table looked especially bad in comparison. I did a bunch of research online, bought supplies at Lowe's, and spent a whole Saturday stripping the top of the table. The finish came right off, as well as the red paint. I don't know why they painted it instead of staining it, but I was glad to see it go!

Yuck!

These are the products I used, and they are awesome! I highly recommend.

I'm not going to lie, it was a messy job! Everything got covered in thick, sticky, dark reddish/brown goop. I just threw away the silver bowl because it was so caked. I made many trips back to Lowe's (I can't seem to do house projects any other way). The one container of refinisher I bought wasn't nearly enough - we ended up using six! Between that and the supplies, I spent about $130. That's a lot cheaper than a new table!


After I got most of the red stuff off with the refinisher, I scraped and sanded it down even more. I was thrilled to see how beautiful the wood was underneath!

It was taking so long to do the top that I was temped to stop there. But when I saw how beautiful it was, I had to keep going. I did the two leaves, which we keep in all the time now because we've grown into them. They weren't nearly as bad as the main table, since they haven't been used as much, but I wanted everything to match. I also did the sides and legs. They went much faster - I don't think they put as many layers of finish on them.

Next it was time to stain. I tried one (Special Walnut by Minwax), but I thought it looked too yellow. So then I tried Espresso (also by Minwax) and loved it. A note about stains: you don't need much! I got the small 8oz container, and it was enough for the whole table. They're very cheap (only a few dollars), and you don't feel committed in case you don't like it.

After I let that dry, I applied the Formby's Tung Oil Finish. It took some of the stain off and spread it around, but I liked how it made it look more even and uniform in color. Then I let it dry 24 hours and applied another layer. I debated applying a polyurethane finish on top of this, which would protect the table better, but I just love the look and feel of it right now. We'll see how it goes, but right now I am very protective.

Tada! I couldn't be happier with the end result. It doesn't even look like the same table. In fact I like it even better than when we bought it!
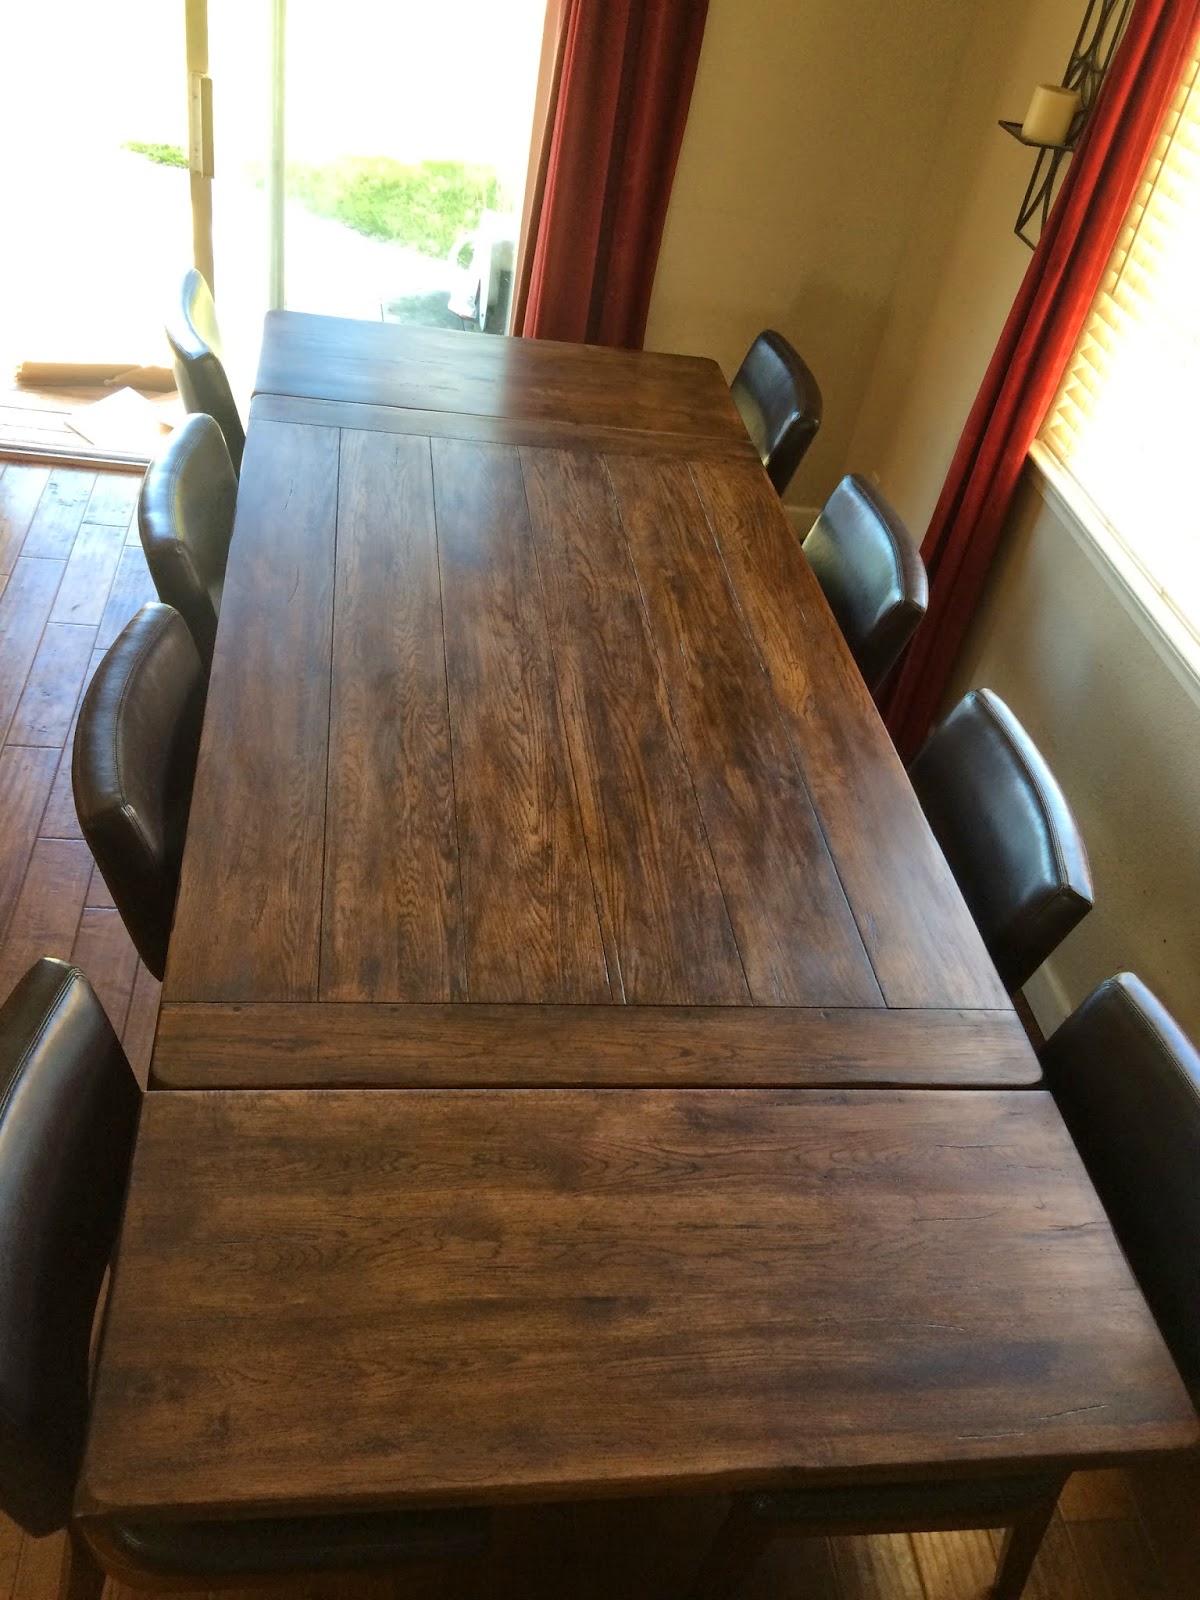
It looks a little blotchy in this picture, but it looks very natural in real life. I love it!

I love how well the table matches the chairs. They look great together.

The wood is so pretty! And heavy! I couldn't believe how heavy it was when we had to turn it on its side and carry it in and out of the house.

Talk about a major accomplishment. Now on to painting the whole upstairs, replacing baseboards, and installing new carpet. Renovations are addicting!
No comments:
Post a Comment