
I didn't get interested in taking pictures until I had children. I had an old 35mm camera with no zoom, and all of my first pictures of Spencer were either blurry or too far away. I knew I had to get a new camera - one with zoom, and that made a huge difference. My pictures improved little by little through trial and error. A few years later Jen gave me a book about photographing babies, and I LOVED it. I'm sorry that I can't remember what it's called, and I'm not exactly sure where it is right now. But here are the main things I learned:

1. Get close. Then zoom in even closer. Babies are little, and the only way you can really capture their cuteness is to get super close. It's okay if part of the head gets cut off. The focus is the face.

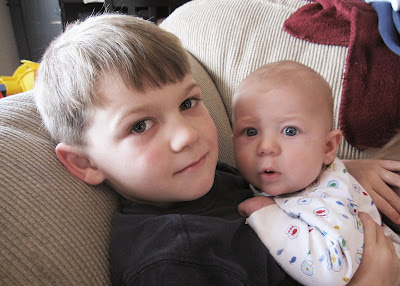
This is a pretty cute picture, but you can't see Levi's face too well.
 Much better!
 2. Turn off the flash. I almost never use a flash - it washes out the face, distorts colors and makes everything look flat. There are external flashes and diffusers out there, but that's for fancier cameras.
3. Use indirect light (window, front/back porch, garage, under a tree, etc.). You may have noticed that the majority of my indoor shots are taken right next to my front window or sliding glass door. You don't want the sun shining directly on your baby, so a nice cloudy day like today was just perfect. And I know that we're often told to put the light in front of the subject and never behind him, but sometimes I like the look of light lining my baby's face in a profile view like the one above. You may lose some details in the shadows, but I love the contrast of light and dark.
 4. Take LOTS of pictures! Now that most of us have digital cameras, it is super easy to take a gazillion shots. And the more pictures you take, the more likely you are to get a good one. Plus we can learn by trial and error much faster when we take bunches of pictures and can see them immediately.
 5. Finally (and this is my tip, not the book's), have fun playing with your pictures. If you have one that didn't turn out so great because of lighting or something, don't immediately delete it. You may be able to salvage it later. For example Levi's forehead was slightly overexposed in this picture (it had that shiny look to it); but I liked it because he looked so cute sucking his thumb. So I converted it to black and white and increased the contrast for a dramatic effect.
  You know it's time to stop when your baby gets fussy. My photo shoots are rarely planned. I just happen to notice that my baby is looking especially cute and happy and that the lighting is decent, and I take pictures quick before he gets tired/cranky.
3 comments:
Thanks so much for that Hilary! Hopefully I can take your advice and put it into action :) Isn't it most fun when you have lots of cute little subjects to photograph? What do you do with your pictures, in other words, do you scrapbook them, print them and put them in an album, organize them on a hard drive or something entirely different?
it changes. i used to immediately develop a roll of film and stick them in photo albums, but i haven't done that much with my digital pictures - i just print them as needed for projects. i did get an external hard drive to store them, but i need to print more.
Hilary,
May I suggest archiving the pictures more permanently than the hard drive--ie. burn them to a disk or use an online backup? It would be sad if your drive crashed and you lost them.
Post a Comment